


When I’m working on client projects, one of the first errors I usually run into goes something like this:
Error: Permission denied. Cannot access camera/location/storage.Or on Android specifically:
java.lang.SecurityException: Permission Denial:
requires android.permission.CAMERA
Quick Fix First
If you’re hitting this error right now, here’s what I do to fix it fast:
- I install the permissions library:
bash
   npm install react-native-permissions
cd ios && pod install- I add the permission to
AndroidManifest.xml(Android) andInfo.plist(iOS) this is the step most developers forget, and it’s the #1 cause of this error. - I request the permission at runtime before using the feature:
javascript
   import { request, PERMISSIONS } from 'react-native-permissions';
   await request(PERMISSIONS.ANDROID.CAMERA);
That’s the 60-second fix. Now let me walk you through how I actually handle permissions properly in client projects.
Why Permissions Matter in Client Work
Whenever I start a new React Native project for a client, permissions are one of the first things I plan out. I’ve learned the hard way that if you handle permissions poorly, your app gets denied on the App Store, users uninstall it within minutes, or worse, the client comes back complaining that “the camera doesn’t work on some phones.” So I treat permissions as a core feature, not an afterthought.
In this article, I’ll share exactly how I create and manage permissions in my React Native apps the same approach I use for every client project I deliver.
My Go-To Library: React-Native-Permissions
I always reach for react-native-permissions because it gives me one consistent API for both iOS and Android. React Native does ship with a built-in PermissionsAndroid module, but it only covers Android, and I don’t want to write platform-specific code twice.
Here’s how I install it:
bash
npm install react-native-permissions
cd ios && pod install
I Configure the Native Files
Before I write any JavaScript, I make sure the native side is set up. Skipping this step is what causes that “Permission denied” error I mentioned at the start.
For iOS, I open ios/YourApp/Info.plist and add usage descriptions. I take these descriptions seriously because Apple’s reviewers actually read them:

xml
<key>NSCameraUsageDescription</key>
<string>We need camera access so you can take profile photos</string>
<key>NSLocationWhenInUseUsageDescription</key>
<string>We use your location to show nearby stores</string>
<key>NSPhotoLibraryUsageDescription</key>
<string>We need photo access to let you upload images</string>
For Android, I add the permissions in android/app/src/main/AndroidManifest.xml:
xml
<uses-permission android:name="android.permission.CAMERA" />
<uses-permission android:name="android.permission.ACCESS_FINE_LOCATION" />
<uses-permission android:name="android.permission.READ_MEDIA_IMAGES" />
I Check Before I Request
I never just call request() blindly. I always check the current status first, because the user might have already granted or permanently denied the permission. Here’s the pattern I use:

javascript
import { check, request, PERMISSIONS, RESULTS } from 'react-native-permissions';
import { Platform, Alert, Linking } from 'react-native';
const handleCameraPermission = async () => {
const permission = Platform.OS === 'ios'
? PERMISSIONS.IOS.CAMERA
: PERMISSIONS.ANDROID.CAMERA;
const status = await check(permission);
if (status === RESULTS.GRANTED) {
return true;
}
if (status === RESULTS.DENIED) {
const result = await request(permission);
return result === RESULTS.GRANTED;
}
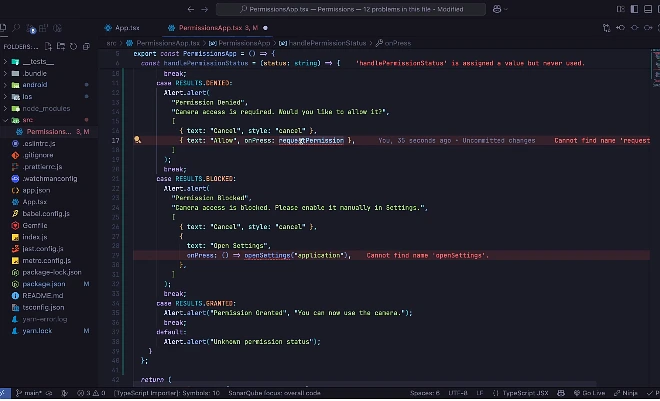
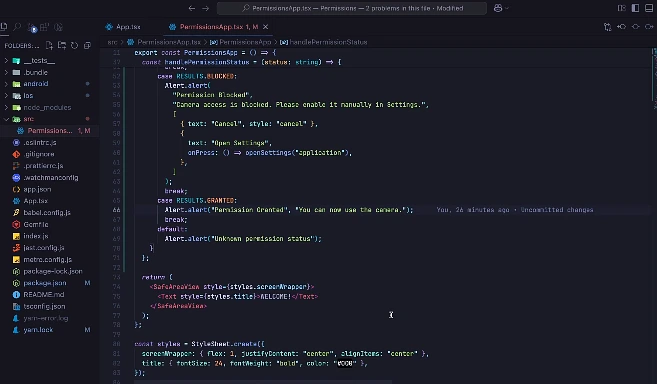
if (status === RESULTS.BLOCKED) {
Alert.alert(
'Permission Needed',
'Please enable camera access in your phone settings',
[
{ text: 'Cancel', style: 'cancel' },
{ text: 'Open Settings', onPress: () => Linking.openSettings() },
]
);
return false;
}
return false;
};The five possible results I always handle are UNAVAILABLE, DENIED, LIMITED, GRANTED, and BLOCKED. The BLOCKED state is critical once the user blocks a permission, I can’t show the system prompt again, so I redirect them to Settings.
I Wrap It in a Custom Hook
For client projects, I don’t want to repeat this logic every time. So I build a reusable hook that I drop into any component:


javascript
import { useState, useEffect, useCallback } from 'react';
import { check, request, RESULTS } from 'react-native-permissions';

export const usePermission = (permission) => {
  const [status, setStatus] = useState(null);

  const checkPermission = useCallback(async () => {
    const result = await check(permission);
    setStatus(result);
    return result;
  }, [permission]);

  const askPermission = useCallback(async () => {
    const result = await request(permission);
    setStatus(result);
    return result === RESULTS.GRANTED;
  }, [permission]);

  useEffect(() => {
    checkPermission();
  }, [checkPermission]);

  return {
    status,
    isGranted: status === RESULTS.GRANTED,
    isBlocked: status === RESULTS.BLOCKED,
    request: askPermission,
  };
};
Then in my screens, I just use it like this:
javascript
const { isGranted, request } = usePermission(PERMISSIONS.IOS.CAMERA);

<Button
  title="Open Camera"
  onPress={isGranted ? openCamera : request}
/>
I Ask at the Right Moment
This is the part I emphasize most to clients. I never request permissions at app launch that’s the fastest way to get denied. Instead, I ask in context: I request camera access when the user taps “Take Photo,” location when they tap “Find Nearby,” and notifications after they’ve completed their first meaningful action in the app.
I also show a short explanation screen before the system prompt whenever the reason isn’t obvious. A simple “We use your location to show stores within 5km” sentence has saved me from countless permission denials in production apps.
I Always Build a Fallback
Users will deny permissions. I plan for it. If someone denies camera access, my image picker falls back to the photo library. If they deny location, I let them search by city name manually. The app should never feel broken because of a denied permission it should just work in a slightly reduced way.
Best Practices for User Experience
Managing permissions effectively is as much about UX as it is about code:
- Guide to Settings: If a permission is
BLOCKED, useopenSettings()from thereact-native-permissionslibrary to send the user directly to the app’s system settings page. - Request in Context: Don’t ask for all permissions at app launch. Wait until the user triggers a feature that specifically requires it (e.g., clicking the “Take Photo” button).
- Use Pre-Permission Education: Show a custom “explain-screen” before the system dialog to tell users the benefits of granting access.
- Graceful Degradation: If a user denies permission, keep the app functional by disabling only the relevant feature rather than blocking the entire app.