

In today’s fast-paced digital world, I’ve learn that hosting an event which feels truly special can be a real challenge. Whether I’m planning a birthday, a wedding, or a corporate gathering, I always remind myself of one thing.
The first impression begins long before the guests even arrive.
The invitation sets the tone, hints at the theme, and conveys the excitement I want everyone to feel. It doesn’t just provide information, it creates anticipation and makes my guests feel genuinely valued.
Creating Invitations That Leave a Lasting Impression

Whenever I sit down to design invitations, I remind myself that crafting something memorable isn’t just about picking a pretty design.
It’s about considering my audience and reflecting my event’s personality. I always aim to strike the right balance between elegance and practicality.
For those moments when I want to add a tangible, tactile element, I love exploring ways to print invitations. This approach adds a level of sophistication that digital-only invites can’t always achieve.
I imagine handing my guest a beautifully designed card that they can hold, admire, and even keep as a memento. It transforms a simple invite into a cherished keepsake.
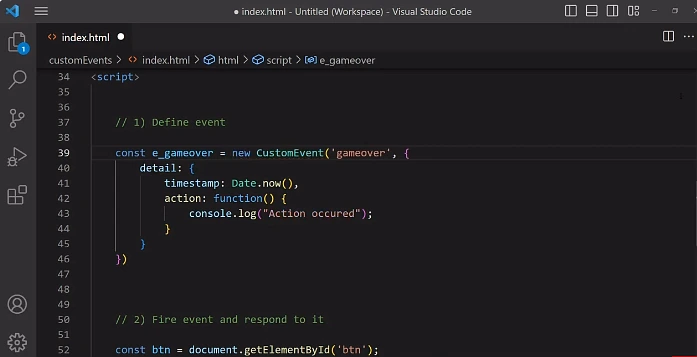
Why I Love Using JavaScript in My Invitations
When I use JavaScript in my designs, I can go beyond static layouts. It opens up a world of creative possibilities that truly surprise my guests.


Here are a few things I love doing with JavaScript:
- Animate text to reveal event details with smooth transitions.
- Personalize the invite dynamically by displaying each guest’s name.
- Add sound effects to create a more engaging experience.
- Trigger animations the moment a guest opens the invitation.
Here’s a small example I like to use to bring my invitation to life:
html
<!DOCTYPE html>
<html lang="en">
<head>
  <meta charset="UTF-8">
  <meta name="viewport" content="width=device-width, initial-scale=1.0">
  <title>Event Invitation</title>
  <style>
    body {
      background: linear-gradient(135deg, #fceabb, #f8b500);
      font-family: 'Poppins', sans-serif;
      text-align: center;
      color: #333;
      padding: 50px;
    }
    .invitation-card {
      background: white;
      border-radius: 20px;
      padding: 40px;
      box-shadow: 0 10px 20px rgba(0,0,0,0.2);
      display: inline-block;
      opacity: 0;
      transform: scale(0.8);
      transition: all 0.8s ease;
    }
    .invitation-card.show {
      opacity: 1;
      transform: scale(1);
    }
    h1 {
      color: #f8b500;
    }
    p {
      font-size: 1.1em;
    }
  </style>
</head>
<body>
  <div class="invitation-card" id="card">
    <h1>You're Invited!</h1>
    <p>Join us for an unforgettable evening of celebration and connection.</p>
    <p><strong>Date:</strong> December 15, 2025<br>
       <strong>Location:</strong> Grand Ballroom, City Center</p>
  </div>

  <script>
    window.addEventListener("load", () => {
      const card = document.getElementById("card");
      setTimeout(() => {
        card.classList.add("show");
      }, 300);
    });
  </script>
</body>
</html>
Tips I Follow for Designing the Perfect Invitation
Over time, I’ve developed a simple set of rules that never fail me. These are the key tips I always keep in mind:
- Know your theme and tone before picking colors or layouts.
- Personalize the experience with dynamic names or custom RSVP links.
- Focus on readability so the key details are crystal clear.
- Choose quality materials that feel luxurious in the hand.
- Use visual hierarchy to guide the reader’s eye naturally.
Bringing My Designs to Life
A formal wedding might call for classic typography and elegant embellishments. A summer garden party, on the other hand, could embrace bright colors and playful illustrations.
I’ve also found that personalization makes my invite unforgettable. I often use JavaScript to dynamically display guest names or generate unique QR codes for each person.
javascript
const guestName = "Alex";
document.getElementById("greeting").textContent = `Hey ${guestName}, you're invited!`;
No matter how stunning my design is, clarity always wins. I make sure the date, time, location, and RSVP details are easy to read and well-organized.
I’ve also realized that the paper I choose communicates value. A thicker, textured paper makes my invitation feel luxurious and substantial.
For animations, here’s one I love using to direct focus naturally:
javascript
gsap.from(".event-title", { duration: 1.2, y: -50, opacity: 0, ease: "power2.out" });Real Life Examples That Inspire Me
I still remember when a close friend of mine threw a milestone birthday party. She invested time in designing custom invitations that mirrored the theme of her celebration.
When guests received their invites, many commented that it gave them a preview of the evening’s vibe. It made them even more excited to attend.
I’ve also watched small businesses use high-quality invitations to make their product launches feel exclusive. It creates real buzz before the event even begins.
These examples show me that thoughtful invitations serve as an extension of my event’s branding and emotional impact. A printed invite carries weight that a simple text or email cannot, forging a tangible connection before the first guest even steps through the door.
Making the Process Enjoyable and Stress Free
I’ve learned that designing invitations doesn’t need to be overwhelming. A calm, step-by-step approach always works best for me.
Here’s the workflow I usually follow:

- Sketch a rough layout to visualize the overall structure.
- Gather inspiration from online galleries and design blogs.
- Pick a color palette and fonts that match the event’s mood.
- Decide on delivery whether mailed, handed out, or included in a welcome package.
Thinking through these details early helps me prevent last-minute stress.
Tools That Save Me Time
When my time or design skills feel limited, I turn to online tools to create polished, professional results. Many platforms let me customize templates while keeping full creative control.
These are my go-to tools whenever I need to speed up the workflow:
- Figma for clean, collaborative design work.
- Canva for quick, ready-made templates.
- GSAP for smooth, professional animations.
- Anime.js for lightweight motion effects.
- Framer Motion for interactive, modern transitions.
Using these tools lets me combine ready-made templates with my own custom JavaScript logic. It keeps my process fast without sacrificing creativity.
Conclusion
Whenever I plan an event, I notice how easy it is to focus only on logistics or entertainment. Yet, I’ve come to believe it’s the small touches that leave the biggest impression.
A thoughtfully designed invitation shows care, builds excitement, and elevates the overall experience for my guests.
In the end, I always remind myself that an unforgettable event isn’t just about the day itself, but the journey that begins the moment someone receives my invitation.